⚠️ This feature is available as an add-on. If you'd like access to Foleon Video, contact us here.
In this article
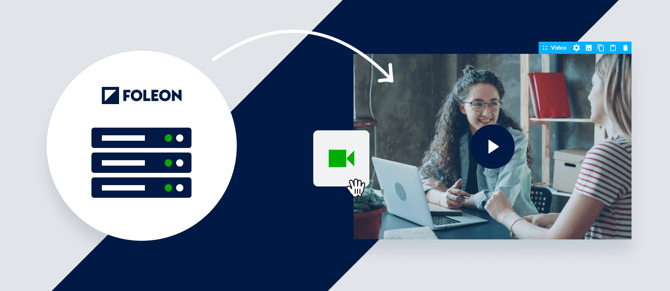
Why use Foleon Video
Foleon Video lets you keep every part of your content experience fully on-brand and under your control. By uploading videos directly to your Foleon Media Library, you avoid external platforms like YouTube or Vimeo — eliminating third-party cookies, external branding, and compliance risks.
Here are some of the benefits of using Foleon Video over external videos:
- Stay on-brand: No YouTube or Vimeo logos, or ads, so your audience stays focused on your content.
- Privacy-friendly: Because no third-party tracking or cookies are used, you comply with strict privacy standards.
- Accessible: Support captions and subtitles to make your videos accessible for wider audiences or for those who prefer watching without sound.
- Empower your team: Anyone can upload videos directly to Foleon without needing access to external video platforms or editing tools.
- Fast & easy: No rendering, embedding, or copy-pasting links. Just upload, publish, and play for faster load times.
- Fully integrated: Videos flow naturally within your Foleon Docs. They autoplay smoothly, maintaining a cohesive design.
-
Responsive design: Videos hosted on Foleon scale better across devices, ensuring a consistent experience on desktop, tablet, and mobile.
How to upload your video
Step 1: Add a video to your page
- In the editor, drag and drop a video element onto your page.
- Or, select a video as your block background.
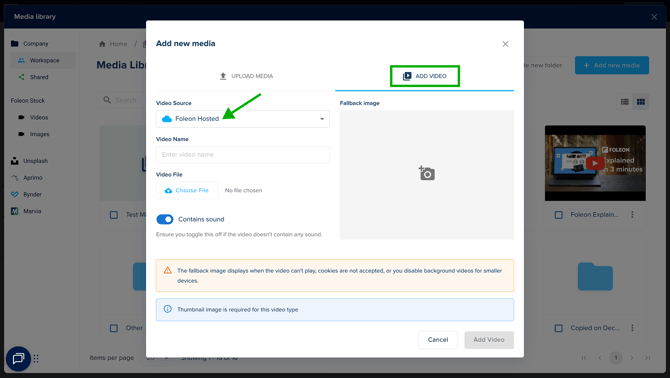
Step 2: Add new media
- In your Media Library, click + Add new media.
- Select the tab Add Video.
- Under Video source, select Foleon Hosted from the dropdown menu.
Step 3: Upload your video
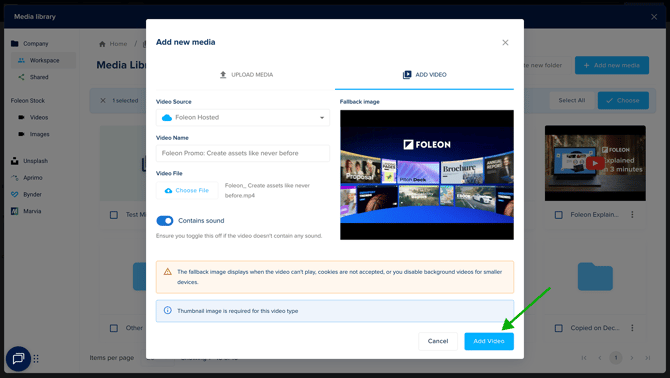
- Name your video. Use a clear, descriptive name so your team can easily find it later
- Click Choose file to select your video file from your computer
- If your video doesn't contain any sound, turn off the Contains sound toggle.
- Add a fallback image. Choose an image from your media library that will appear before the video plays.
- Click Add Video to upload it to your Media Library
⚠️ A fallback image is required. It displays as the thumbnail image before playing or when background videos are disabled on smaller screens.
💡There's no maximum file size for uploads. However, we recommend keeping videos under 1 hour, since longer files can slow load times and affect Doc performance.
Step 4: Add your video to your Foleon Doc
- Once uploaded, click your video to select the file.
- Click ✓ Choose to add it to your Foleon Doc. It may take a few minutes to process.
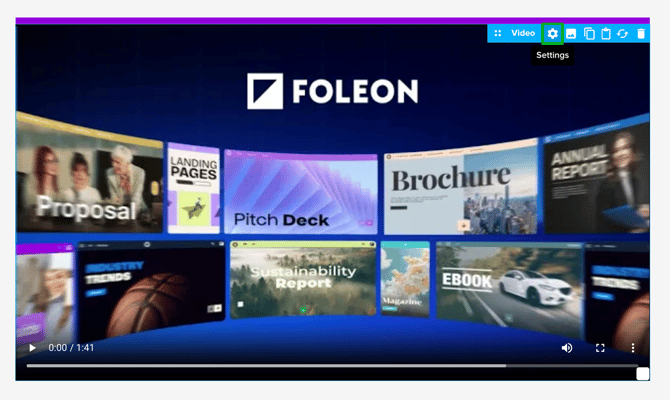
- After it's added, you can adjust the settings as needed:
- For video elements, customize spacing, alignment, and animation or enable autoplay.
- For background videos, adjust settings like looping and autoplay.
💡 Processing time depends on your file size. Longer videos will require additional processing time before they’re available in your Media Library.
Step 5: (Optional) Add subtitles and captions for accessibility
Adding subtitles and captions helps make videos more accessible and supports multilingual audiences:
- Captions include background sounds, speaker labels, and audio cues, making them ideal for accessibility.
- Subtitles display the spoken words on screen. They are useful when viewers can’t turn on the sound, and also support multiple languages.
How to add subtitles and captions:
-
Go to your Media Library and find your video
-
Double-click the video, or click the quick actions menu (⋮) and select Preview
-
In the right-side panel, click + New file under the section Captions and subtitles
-
Click Choose file and select the SRT file from your computer
-
Select the language of the file and choose the type (caption or subtitle)
-
Click Upload to add the file to your video
-
Click Save
💡 You can upload multiple subtitle files for different languages, such as English, Spanish, French, and German.

How to manage subtitles and captions:
Once uploaded, subtitle files can be edited, downloaded, deleted, or disabled.
- Open the quick actions menu (⋮) to edit, delete, or download the file

- Use the toggle to enable or disable the caption or subtitle. Disabling the file removes it from the viewer's available options.

Video experience for viewers
Foleon Video offers a clean, distraction-free viewing experience. Videos appear in a simple, responsive player with no external branding or ads. Playback controls appear on hover in a minimal interface.
If subtitles or captions are available, viewers can select their preferred language directly in the video player.

Video transfer credits
When you enable Foleon Video, you’ll choose from a range of add-on subscription options, each offering a specific amount of monthly bandwidth (measured in terabytes). As viewers stream your videos, credits are consumed based on the playback minutes.
Credits are automatically renewed monthly, based on your billing cycle. You can easily track your credit usage directly in your Admin Console under Plans & Billing > Credits.
📖 For more information, read our article: All about video transfer credits
What happens when a video is deleted
If a video is removed from your Media Library, the video element is automatically removed from any Doc it was placed in; you won't see it in the editor or the preview. When you republish the Doc, the video is also removed from the live version.