In this article
Why use tags to manage assets?
Tagging brings structure to your Media Library, making it easier to manage large volumes of content without relying on folders alone.
With tagging, you can:
- Quickly find the right assets using filters instead of manual searching
- Reduce duplication by reusing existing assets
- Maintain governance across regions, brands, or campaigns
- Ensure teams use approved and relevant content
For example, a global marketing team can tag assets by region, campaign, and lifecycle stage. This allows users to filter and find only the assets that are relevant to their market or use case.
📹 In the video below, we show you how to set up your tags, tag files in your Media Library, and filter using tags to find your files.
Managing tags
Tag management is handled centrally by Admins and Designers in the Brand Console > Tag Management.
How tags are organized
Tags are structured into tag groups, which act as categories for your tags.
- A tag is a label applied to an asset (for example: “EMEA” or “Q1 Campaign”)
- A tag group is a collection of related tags (for example: Region or Campaign)
There are two types of tags and tag groups:
- System tags and tag groups are predefined by Foleon and available by default. They are designed to help you get started quickly with a ready-made structure. While they cannot be edited or deleted, they can be deactivated and hidden if they are not relevant to your workflow.
- Custom tags and tag groups are created and managed by you in the Brand Console to reflect your organization's structure. These can be tailored to match your campaigns, regions, or brands, and can be updated as your needs evolve.
All tag groups and tags are created and managed in the Brand Console and are available to users in all workspaces.
Example tag structure:
Here's an example of how you might structure tag groups and tags in your account:
| Tag group | Example tags |
| Campaign | Summer Launch, Product Update, Webinar, Event |
| Brand | Brand A, Brand B, Brand C |
| Language | English, Dutch, German, Spanish |
| Use Case | Demand Marketing, Buyer Enablement, Employee Comms |
Create a tag group
Admins and Designers can create tag groups to define how assets should be categorized.
💡 Only Admins and Designers with access to the Brand Console can create tag groups
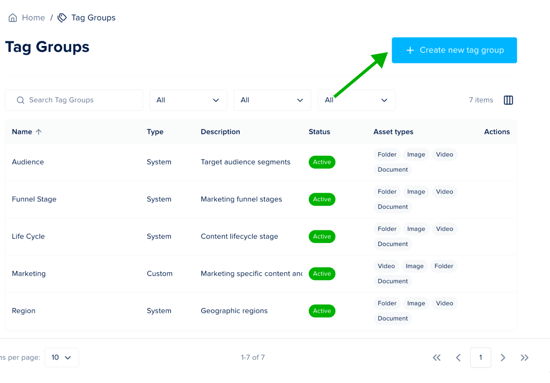
- Navigate to the Brand Console and open Tag Management > Tag Groups.
- Click Create tag group.
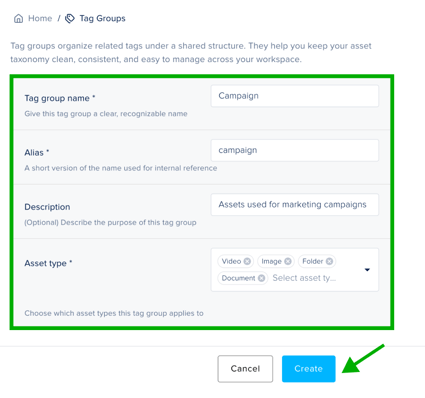
- Enter a name for your tag group. Choose a clear and recognizable name that reflects how you want to organize your assets (for example: Campaign or Brand).
- Review or edit the alias. The alias is a unique identifier for the tag group. It is automatically generated based on the name, but you can adjust it if needed. Each alias must be unique.
- (Optional) Add a description. Describe the purpose of the tag group and help others understand how it should be used.
- Choose which asset types this tag group applies to. This ensures the tag group is only used where relevant (for example: only for documents, not images)
- Click Create to save your tag group.
Once created, the tag group will be available for creating tags.
Create a tag
Tags let you label assets for easier searching and filtering. Each tag belongs to a tag group, which keeps related tags organized and maintains a clear, structured taxonomy.
💡 Only Admins and Designers with access to the Brand Console can create tag groups
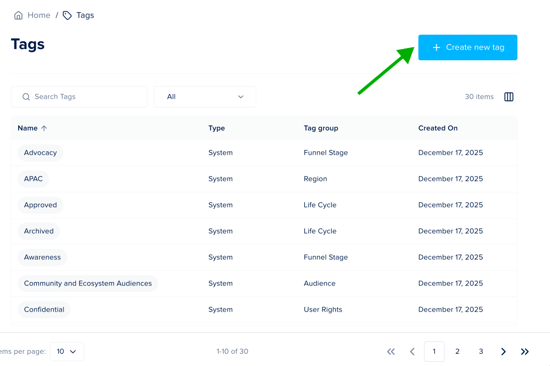
- Navigate to the Brand Console and open Tag Management > Tags.
- Click Create tag.
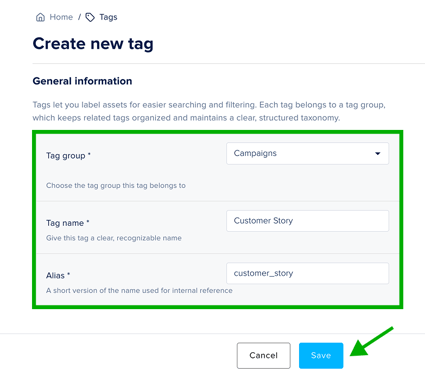
- Select a tag group from the dropdown. This keeps related tags organized and ensures a consistent structure.
- Enter a tag name. Give your tag a clear and recognizable name (for example: “Product Launch” or “Customer Story”)
- Review or edit the alias. The alias is a unique identifier for the tag. It is automatically generated based on the tag name, but you can adjust it if needed. Each alias must be unique.
- Click Save to save your tag.
Once created, the tag will be available for users to apply to assets and use in filters.
💡 Use consistent naming conventions for tags (for example: always singular or always title case) to keep your Media Library easy to scan and use.
Deactivate or delete tag groups
If a tag group is not relevant or you do not want it shown to users, you can deactivate it to hide the tag group and corresponding tags from users.
To deactivate or delete a tag group:
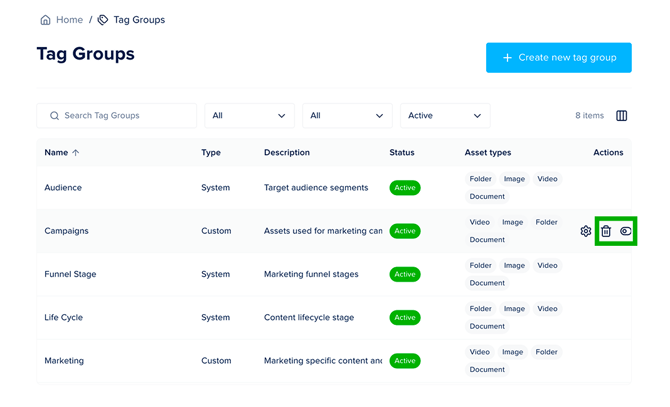
- Navigate to the Brand Console and open Tag Management > Tag Groups
- Find your tag group in the list and select one of the options under Actions:
- Deactivate (toggle): After a tag group has been deactivated, the tag group will no longer be available for filtering and tagging assets. The tags within this tag group will not be removed from the assets they've been assigned to.
- Delete (trash icon): This action permanently deletes the tag group and all tags within this group.
- Click Confirm to deactivate or delete the tag group
💡 Before you can delete a tag or tag group, you must first remove it from all assigned assets.
⚠️ Deleting a tag group will delete the tag group and all tags within the group. This is a permanent action that cannot be undone.
To reactivate a tag group:
-
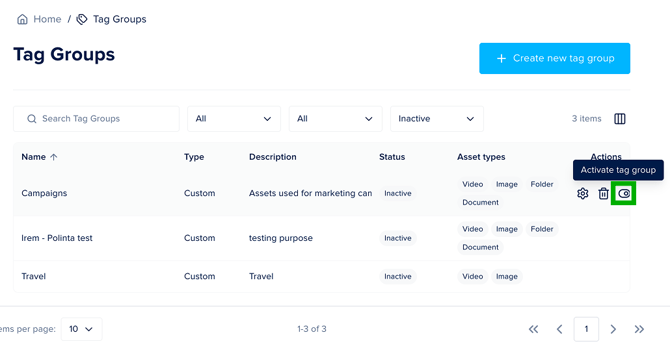
Navigate to the Brand Console and open Tag Management > Tag Groups
-
Click Add filter and select the option Status
-
Filter on Inactive
- Find your tag group from the list and select Activate tag group from the Actions.
- Click Confirm
Using tags
Once tags are set up, you can use them to organize and quickly find assets in your Media Library.
Assign tags to assets
Once tags are created, anyone with access to the Media Library can apply them to assets.
When you upload a new file to the Media Library, a panel appears where you can add tags to your asset.
⚠️ We recommend adding tags right away to keep your assets organized, but this step is optional. To close the panel, click outside of it or use the dismiss button.
💡 Tags are organized by tag group. You can also type in the field to quickly find a specific tag.
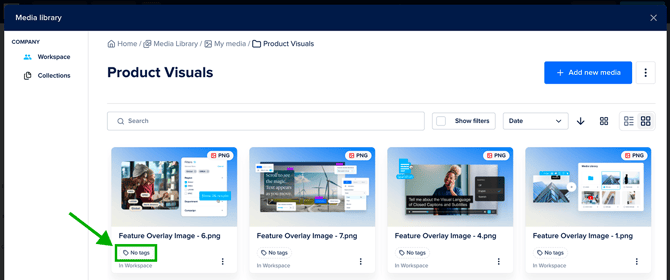
To tag a single asset:
- Navigate to the Media Library. You can access this from the dashboard or from the menu in the editor.
- Click the tag chip on the asset card (in grid view), or click the link in the Tags column (in list view).
- In the pop-up window, type to search for existing tags.
- Click a tag to select it.
- To remove a tag, click the × on its chip, or click Clear all to remove all current selections.
- Click Save to apply your changes.
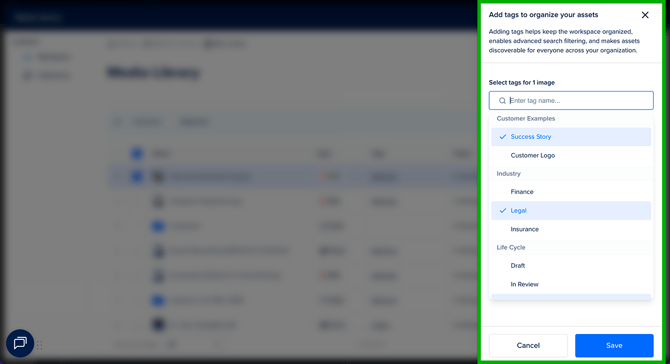
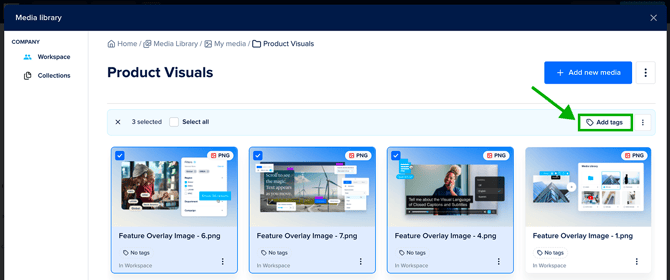
To tag multiple assets at once:
- Navigate to the Media Library.
- Select the assets you want to tag.
- Select Add tags.
- In the sidebar, type to search for existing tags.
- Click a tag to select it.
- To remove a tag, click the × on its chip, or click Clear all to remove all current selections.
- Click Save to apply your changes
💡 Use a combination of tags (for example: campaign + language + use case) to make your assets easier to find across different teams and workflows.
Filter assets using tags
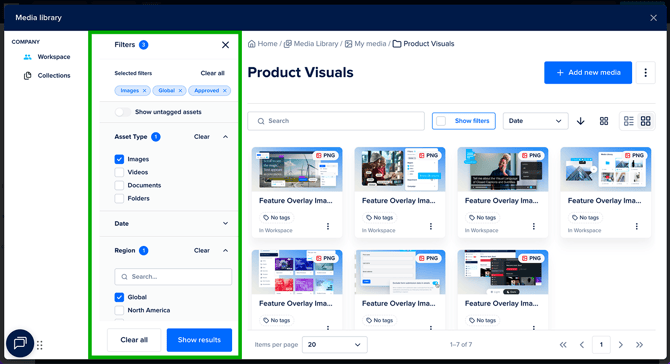
Use the Filter panel to quickly find the assets you need.
- Navigate to the Media Library.
- Click Show filters to open the Filter panel.
- (Optional) Toggle Show untagged assets to display only assets without tags.
- Select your filters. You can filter by:
- Asset type: Images, videos, documents, or folders
- Origin: In Workspace or In Brand Console
- Date created: Today, last 7 days, last 30 days, this year, or a custom range
- Tags: Organized by tag group, reflecting the tags set up in Tag Management
- Search for specific tags if needed. Type in the search field to find and select relevant tags within each tag group.
- Select one or more tags. You can combine filters across multiple categories to refine your results.
- Click Show results to apply your filters.
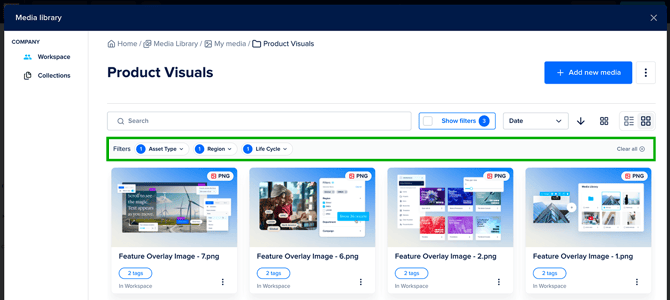
After applying filters, your active selections appear as chips at the top of the panel.
- To adjust a filter, click its chip and make your changes. Updates apply automatically.
- To remove all filters at once, click Clear all.
FAQs
What is a tag?
A tag is a label applied to an asset to improve search and filtering in the Media Library.
What is a tag group?
A tag group is a collection of related tags (for example: Campaign or Region). Tag groups help structure your tags and keep your asset library organized as it grows.
What’s the difference between system and custom tags?
System tags and tag groups are predefined by Foleon and available by default. They help you get started quickly with a ready-made structure.
-
Custom tags and tag groups are created and managed by Admins to reflect your organization’s structure, such as campaigns, brands, or workflows.
-
System tags are predefined by Foleon and cannot be edited or deleted, but they can be hidden if they are not relevant.
Who can create or manage tags and tag groups?
Only Admins and Designers with access to the Brand Console can create and manage tags and tag groups.
Who can apply tags to assets?
Anyone with access to the Media Library can apply existing tags to assets.
Where do the filters in the Filter panel come from?
All filters in the Media Library are based on:
- Tag groups and tags created in Tag Management
- System tag groups provided by Foleon
- File attributes such as asset type
Can I filter assets using multiple criteria?
Yes. You can combine filters across tags, tag groups, folders, and asset types to quickly narrow down results.
Are tags mandatory?
No. Tags are optional.