![foleon_logo_white.png]](https://www.foleon.com/hs-fs/hubfs/foleon_logo_white.png?height=40&name=foleon_logo_white.png)
In this article:
📖 For more on creating and styling your form, read All about Forms.
Any Foleon form can send its submissions to an external URL. When someone submits the form, Foleon sends the data to that URL as an HTTP POST request, which is the standard way web forms deliver data. Most tools that collect form data accept submissions this way, including Salesforce Web-to-Lead, marketing automation platforms, and custom endpoints your development team builds.
The receiving system decides what the data needs to look like. Your job in Foleon is to match your form to those requirements: use the field names it expects, include any values it requires, and point the form at the right URL. The examples in this article use Salesforce Web-to-Lead, but the setup can be used for other systems.
Get your endpoint details
Before you build the form, you’ll need to collect three things from the system you're sending to. You'll usually find these in its documentation, its integration settings, or the sample code it generates.
💡 Every field you want to send must already exist in the receiving system. You can't create fields in another tool from Foleon.
- Find the endpoint URL that receives submissions.
For Salesforce Web-to-Lead, this is the URL inside the <form action="..."> tag of the HTML Salesforce generates for you. - Note the exact name of every field you want to send. These are often different from the labels shown to readers.
Salesforce custom fields, for example, end in __c. - Check whether the system requires any fixed values with every submission.
Salesforce Web-to-Lead requires an organization ID, sent as a field named oid.
Create a form and match your field names
Create a form:
- Open the Foleon Doc and page where you want the form to appear.
- Drag the Form element onto the canvas.
- The form builder will open. Click on any of the fields to add them to your form.
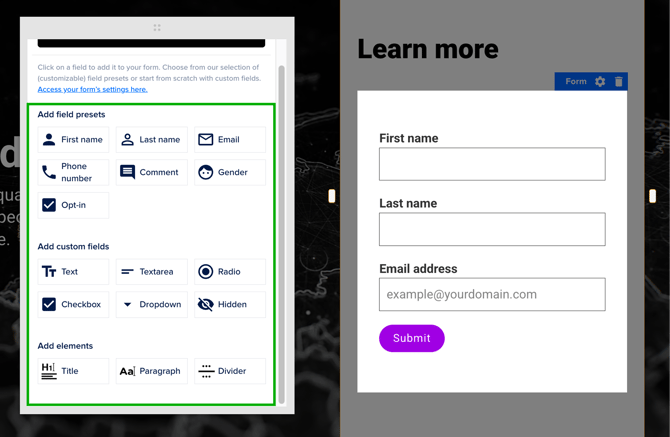
Match your field names:
After the fields have been added to your form, you need to add the field name.
- Hover over the field in your form and click the settings icon.
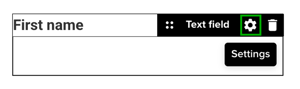
- Open General settings.
- Scroll down to Field name and enter the field name exactly from the receiving system.
For a first name field going to Salesforce, this is first_name. - Repeat for every field in your form.
⚠️ Field names must match what the receiving system expects, exactly. Capitalization and suffixes matter. If a name doesn't match, that value is dropped and the reader still sees a successful submission.
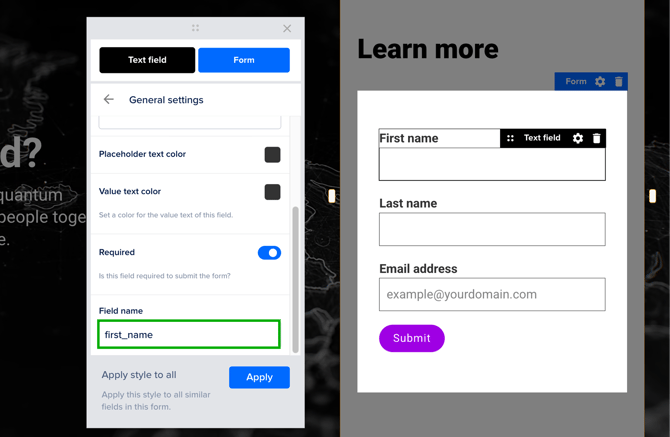
Add your hidden fields
Hidden fields send values the reader never sees or fills in. Use them for values the receiving system needs but the reader shouldn't have to fill in, and for tracking data you want attached to every submission.
- In the form builder, add a Hidden field from the list of available field types.
- Hover over the hidden field in your form and click the settings icon.
- Open General settings.
- Enter the Field name: the field name must match the corresponding field in your receiving system For example, if the hidden field is for campaign_ID__c, set the Field name to campaign_ID__c.
- Enter the Field Value: Enter the value that you want to pass to your receiving system.
For example, for the campaign_ID__c hidden field, you might enter the ID of the campaign you want to track, like 7011Y000000FszR. - Add a hidden field for each additional value, using the same steps.
- Once you’re done adding all the fields, click Done in the top right corner of the window.
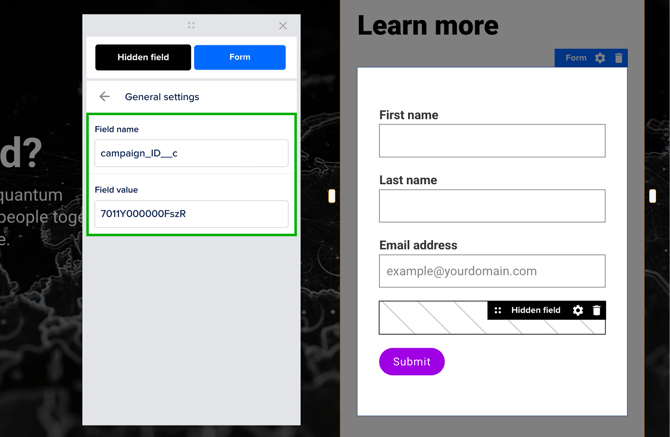
Set the form action and storage
- Hover over your form and click the settings icon.
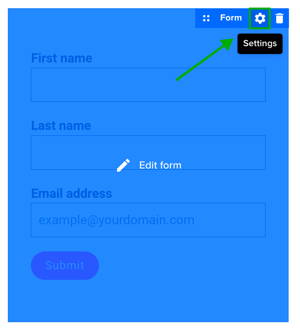
- Open General settings.
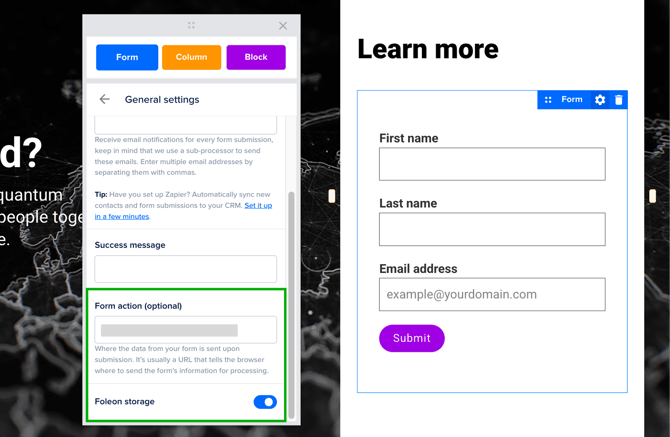
- Paste your endpoint URL into the Form action field.
- Set the Form storage toggle:
- Leave it on to store submissions in Foleon as well as sending them to the external system.
- Turn it off to send submissions to the external system only.
⚠️ You can't turn off Form storage without a valid Form action URL. Foleon needs somewhere to send the data.
Test your form
- Preview your Doc and fill in the form with test data.
- Submit the form.
- Open the receiving system and check that your submission arrived with every visible and hidden value in the right place.
- Publish the Doc once everything comes through correctly.
💡 If the hidden fields are not coming through, double-check that the field names in Foleon match the names exactly in your receiving system, and that you’ve set the correct values.